
A sharp pruning shear is a different tool from a dull one — not marginally better, fundamentally different. A sharp bypass blade slices through stem tissue and preserves the cambium. A dull bypass blade compresses before it cuts, damaging the same tissue that anvil pruners damage. I’ve watched gardeners spend money on better pruning shears when what their current tool needed was five minutes of attention. Learning how to sharpen pruning shears correctly is the highest-return maintenance habit in the garden tool kit.
Why Sharpening Matters Beyond Comfort
The performance difference between a sharp and dull pruning shear isn’t just effort — it’s plant health outcomes. Whether you are using the best pruning shears available or a budget model, a sharp edge is non-negotiable.
A sharp blade draws through live stem tissue cleanly, leaving cambium cells intact at the cut margin. Wound callusing begins immediately from undamaged tissue. A dull blade compresses the stem across a zone before severing it — the cambium around the cut is damaged before the cut is even complete. Healing is slower, the wound is exposed longer, and disease entry risk is higher. This is particularly vital for the best bypass pruning shears, which rely on surgical precision.
On roses and fruit trees where every cut is a wound management decision, sharpening before every major session is the most direct intervention available for plant health outcomes. Even the best professional pruning shears lose their effectiveness if the edge is neglected.
What You Need
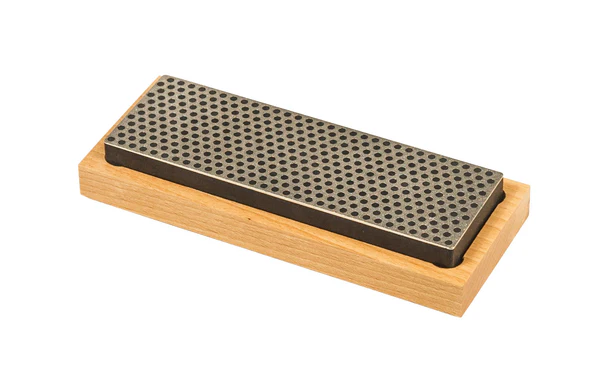
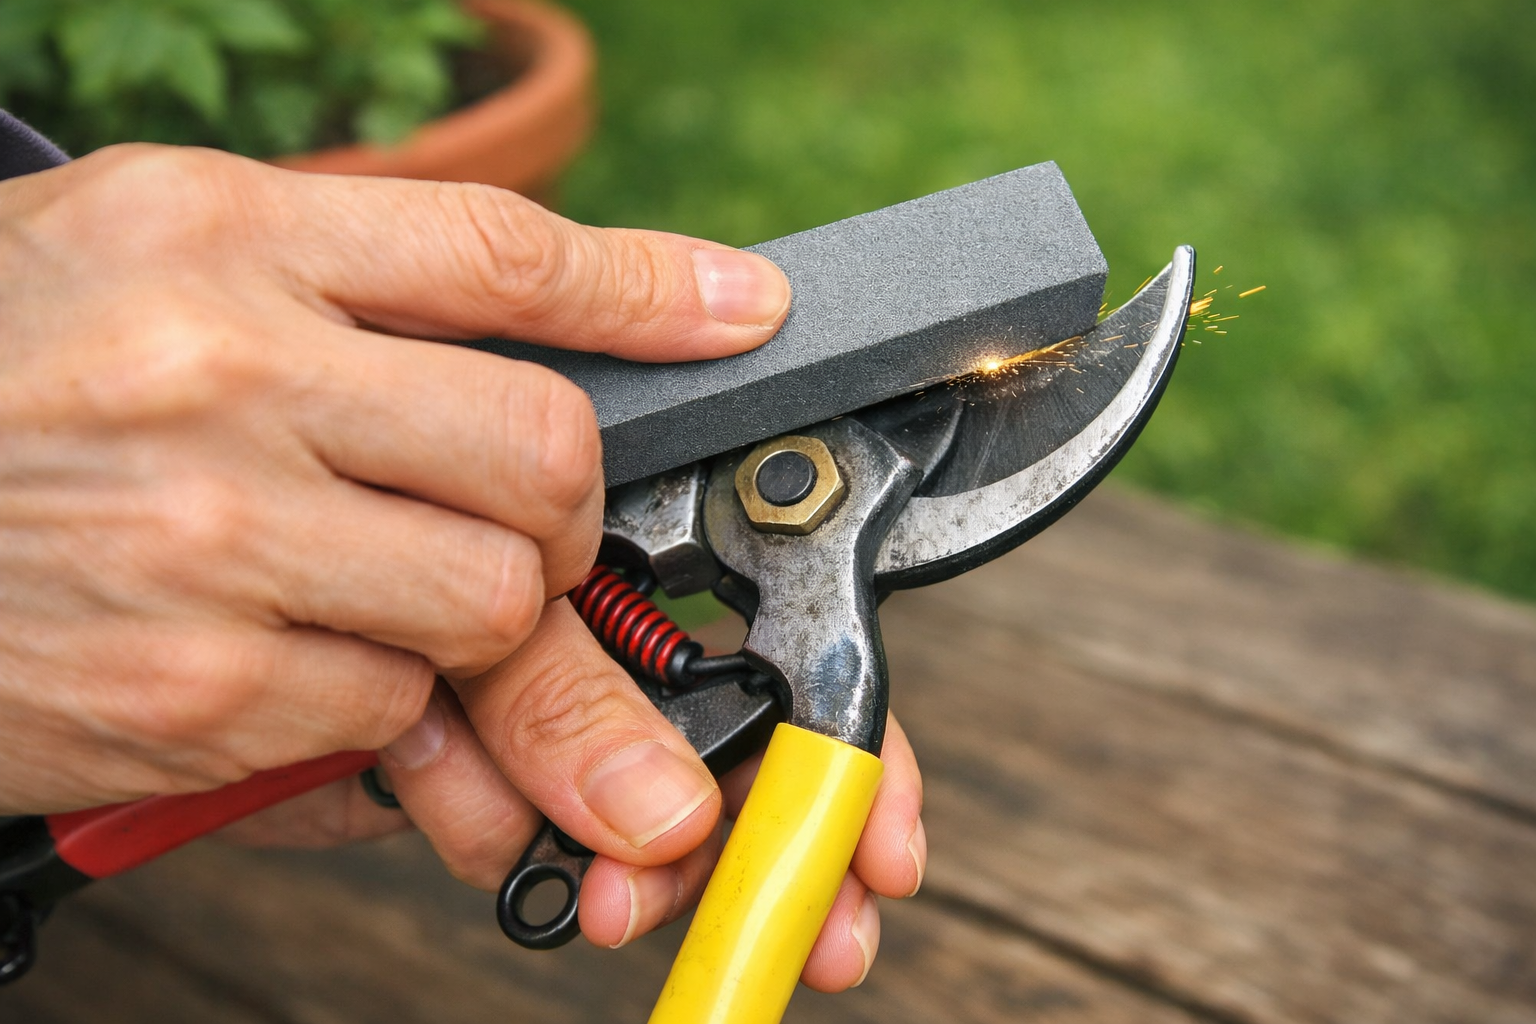
Diamond file or diamond sharpening stone — the correct tool for hardened carbon steel blades hold a sharper edge. Carbide pull-through sharpeners remove too much material unevenly and eventually destroy the bevel geometry. Ceramic rods work but are slower. A quality diamond file costing a few pounds or dollars outperforms every shortcut alternative.
Cleaning cloth and blade oil — sap removal before sharpening allows you to feel the bevel clearly. Oil after sharpening protects the freshly exposed steel from oxidation.
Optional: pivot adjustment tool — usually the correct screwdriver or Allen key for your specific shear model. Pivot tension affects how the blades track against each other — too loose allows wobble, too tight increases friction.
The Sharpening Process — Step by Step

Step 1: Clean the Blade
Wipe down both blades with a cloth dampened with blade cleaner or rubbing alcohol. Sap accumulation is sticky and abrasive — working through it with a sharpening file produces inconsistent results and dulls the file faster.
Step 2: Identify the Bevel
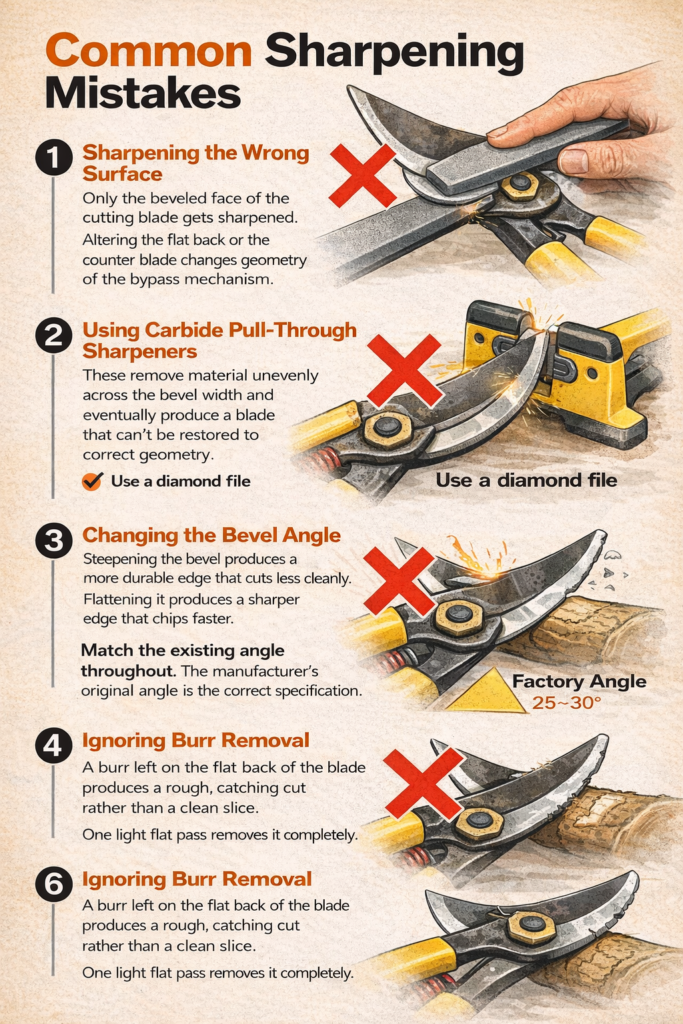
The bevel is the angled ground surface on the cutting blade — typically 25–30 degrees from flat on most pruning shears. This is the only surface that needs sharpening. The flat back of the cutting blade and the counter blade should not be sharpened — doing so alters the geometry that makes the bypass mechanism work correctly.
Step 3: Match the Existing Angle
Hold the diamond file against the bevel surface and feel where full contact occurs across the width of the bevel. This is the correct angle — maintain it throughout the sharpening strokes. Changing the angle removes material from the wrong zone and eventually destroys the bevel geometry that the manufacturer engineered.
Step 4: Work the Full Edge in Smooth Strokes
Draw the file across the bevel from the base of the blade to the tip in one smooth motion, maintaining consistent angle contact throughout. Five to ten strokes for a blade that’s been sharpened recently and maintained between sessions. More strokes for a neglected blade — but if a blade requires extensive work to restore, it may be at replacement time.
Step 5: Remove the Burr
Sharpening raises a thin metal burr on the flat back of the cutting blade. Remove it by drawing the flat back of the blade once across the flat surface of the diamond file — one light pass, no pressure, no angle. The burr removal is what completes the sharp edge.
Step 6: Test on Paper
A sharp pruning shear blade should slice cleanly through a sheet of paper without tearing. If it tears, repeat steps 3–5. If it slices cleanly, proceed to oiling.
Step 7: Oil the Blade
A light application of camellia oil or blade oil to both blade surfaces protects the freshly sharpened steel from oxidation and keeps the cutting action smooth in use.
How Often to Sharpen
Before every major pruning session — not once per season, not when it feels dull. Before every significant session. A sharp blade on a mid-range shear produces better plant outcomes than a dull blade on a professional one.
During long sessions — for professional or high-volume pruning, a mid-session touch-up every two to three hours maintains cut quality across the full day. A field diamond file in the tool bag makes this practical.
After cutting diseased wood — disinfect with diluted bleach or isopropyl alcohol before sharpening, then sharpen. Disease pathogens transferred between plants on an unsterilized blade are a real disease transmission pathway.
Pivot Adjustment — The Overlooked Maintenance Step
Blade wobble — the lateral movement between cutting and counter blade — is caused by a loose pivot rather than blade dullness. A sharp blade with a loose pivot still tears rather than slices because the blade is deflecting sideways rather than maintaining contact with the counter blade throughout the cut.
Check pivot tension after sharpening. The blades should pass each other with light, consistent contact — neither so tight that movement is stiff nor so loose that lateral deflection is visible. Most premium shears adjust with a screwdriver or Allen key at the pivot bolt.
Common Sharpening Mistakes
Sharpening the wrong surface — only the beveled face of the cutting blade gets sharpened. Sharpening the flat back or the counter blade alters the geometry that the bypass mechanism depends on.
Using carbide pull-through sharpeners — these remove material unevenly across the bevel width and eventually produce a blade that can’t be restored to correct geometry. Use a diamond file.
Changing the bevel angle — match the existing angle throughout. Steepening the bevel produces a more durable edge that cuts less cleanly. Flattening it produces a sharper edge that chips faster. The manufacturer’s original angle is the correct specification.
Ignoring burr removal — a burr left on the flat back of the blade produces a rough, catching cut rather than a clean slice. One light flat pass removes it completely.
Final Verdict
Sharpening pruning shears correctly takes five minutes, costs nothing beyond the initial diamond file investment, and produces plant health outcomes that no amount of tool upgrading achieves from a dull blade. Sharpen before every major session. Adjust the pivot while you’re at it. Oil the blades before storage.
The difference in how the garden responds over a season of sharp cutting versus dull cutting is real, visible, and worth every minute of those five.
See also: Best Pruning Shears — 2026 Buyer’s Guide | Best Bypass Pruning Shears | Best Professional Pruning Shears | Pruning Shears vs Loppers