I used to be the kind of gardener who just threw a handful of 10-10-10 fertilizer at everything and hoped for the best. Sometimes it worked, but more often than not, I was just guessing. It wasn’t until I actually started testing my soil that I realized I was over-applying phosphorus while my nitrogen levels were bottoming out.
Testing your soil isn’t about becoming a chemist; it’s about making sure you aren’t spending money on amendments your garden doesn’t actually need. Once you have a baseline, everything from choosing fertilizers to troubleshooting yellow leaves becomes a lot more straightforward (this is where soil strategy actually starts: /best-garden-soil/).
What Actually Matters: The Decision Criteria
When you’re looking at how to test your soil, there are a few practical factors that determine if the data you get is actually useful:
Depth of Sample: Most of a plant’s “feeding” roots stay in the top 6 to 8 inches of soil. If you only scrape the surface, you’re missing the zone where the nutrient exchange actually happens.
Lab Detail vs. Home Speed: A home kit is great for a quick pH check on a Saturday afternoon, but it won’t give you the “buffer pH” or micronutrient levels that a professional lab provides (this matters when adjusting soil chemistry: /soil-ph-guide/).
Representative Sampling: Soil isn’t uniform. Taking a single scoop from one corner of a bed can give you a skewed result.
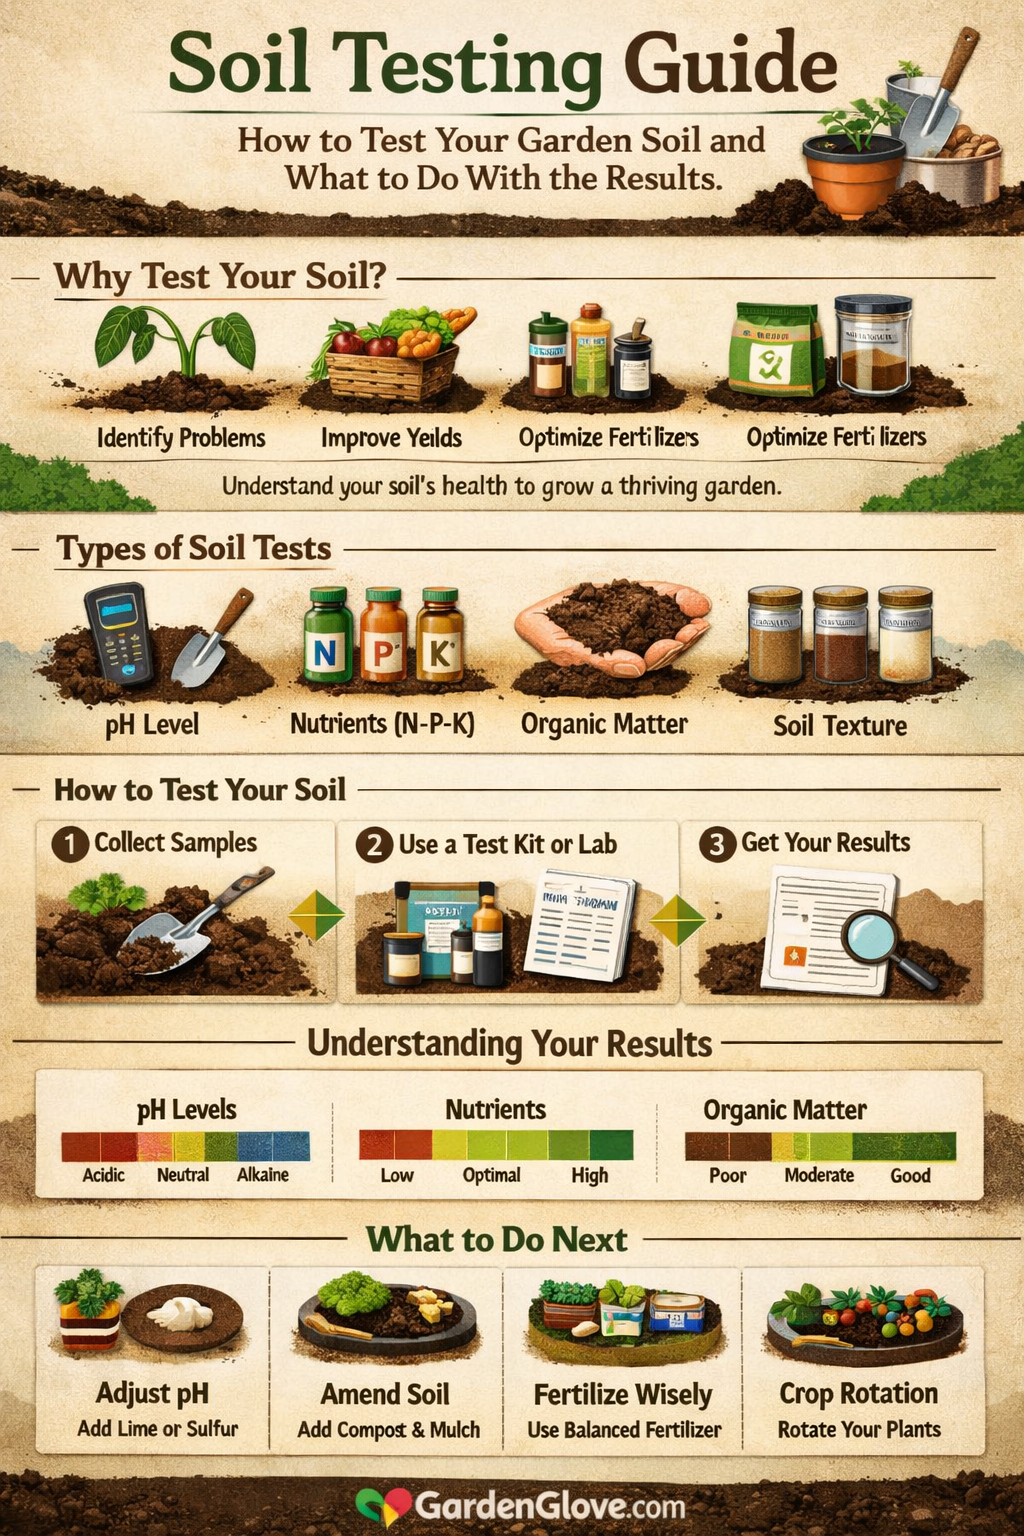
Soil Testing Options
1. Cooperative Extension Lab Tests
Most state universities offer soil testing through their agricultural extension offices.
Why it’s useful: Highly accurate, inexpensive, and provides crop-specific recommendations.
The Trade-off: Turnaround time (2–3 weeks).
2. Digital Soil Probes
Hand-held meters for pH, moisture, or light.
Why it’s useful: Instant readings, useful for monitoring moisture (especially during watering cycles: /vegetable-garden-watering-guide/).
The Trade-off: Accuracy declines over time.
Best Choices by Use Case
For the New Garden: Use a lab test — especially before building soil or planting (this ties directly into soil prep: /vegetable-garden-soil-prep/).
For Indoor Gardening: Digital probes work well in controlled media.
For Large Properties: Multiple samples + lab testing.
How to Take a Proper Soil Sample
Getting a good sample is more about technique than tools.
Clear the Surface
The “V” Cut
Repeat and Mix
The Bucket Rule
Dry and Bag
[Illustration showing the “V” cut sampling method with a trowel]
Practical Insights & Trade-offs
One thing many guides skip is the “Buffer pH.” If your lab report shows a low pH but a high buffer pH, your soil resists change (this is where pH adjustments become more nuanced: /soil-ph-guide/).
You also don’t need to test every year. Once your soil is stable, testing every 2–3 years is usually enough.
For understanding how nutrients move through soil systems:
→ /organic-soil-amendments/
Soil Testing Action Plan
Test in the Off-Season
Use a Plastic Bucket
Dry Soil Only
Target Your Plants
Keep a Log
Amend Slowly
Where to Go Next
If your soil needs improvement:
→ /best-garden-soil/
If you need to correct specific deficiencies:
→ /organic-soil-amendments/
If you’re preparing beds for planting:
→ /vegetable-garden-soil-prep/
If you’re adjusting soil chemistry:
→ /soil-ph-guide/
If you’re deciding between inputs:
→ /compost-vs-garden-soil/